|
|
|
|
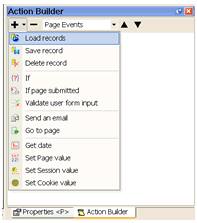
Step 1. In the action
builder click on the + so the drop down menu appears and select Load
records |
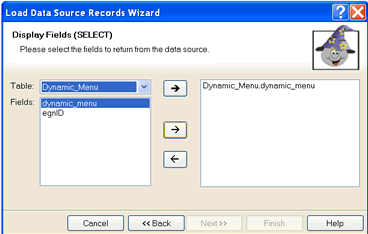
Step
2. When the Load record wizard opens click next>> so you can
select what information you want to be loaded in to the page. First we
will load the menu, from the Table drop down select the Dynamic_Menu then
with the Dynamic_menu field selected click the  so it is transferred to the selected box and then click on Finish
 |
|

|
|
| Your
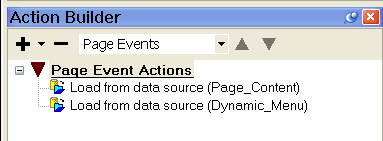
action builder will now look like this. Follow step 1 so we can add a new
Load Record for the Page Content. |
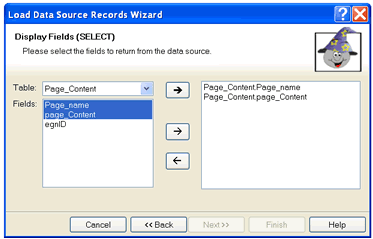
Step
3. This time select the Page_Content table from the drop down and
select Page_Name and page_Content to be transferred to the selected box
when you click on  then click Next >>
 |
|
|
|
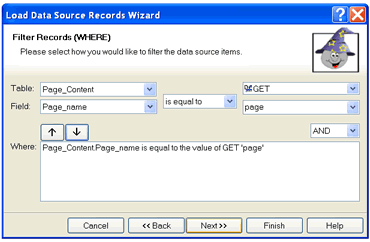
| Step
4. Now we tell it we want to load from the database where the
Page_name is equal to the GET page. So make your selections to match the
picture above and when you select the GET type in page in the dropdown
below it. Then using the down arrow add it to the Where: box. When you
first try to do this you will get a warning message, OK it and click the
down arrow again so the wizard looks like above. Then click on Finish and
end the wizard. |
Your
Action builder should now look like above. You have 2 load record actions,
one for your menu and the second for the page content. |
|

|
|
| Step
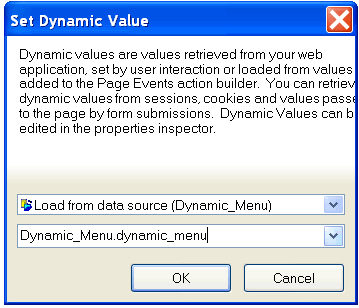
5. Now we are going to make MENU dynamic, mouse over where you typed
MENU on your page and double click so it becomes blocked out, then from
the Format menu select Set Dynamic Value |
Step
6. From the dropdowns select as above, this will then change where you
typed MENU in to a dynamic value and display the contents of dynamic_menu
which is stored in the database. Click OK to finish, if you get a warning
message just ignore it, it is only telling you, you are adding a new item. |
|
|
|
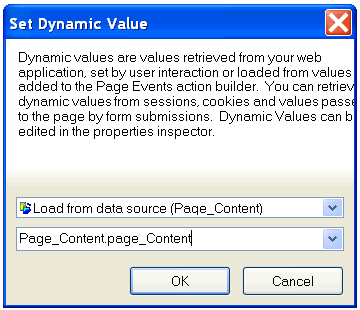
| Step
7. As in step 5 now select CONTENT on your web page so it becomes
blocked out and from the format menu select Set Dynamic Value, this time
select as above, to load from Page_Content and from the second drop down
choose page_Content. Click OK to finish and ignore any warning message |
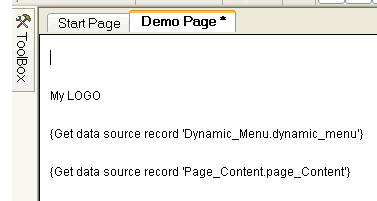
Your
web page should now look like above. All you now need to do is export your
web page and put it on a web server or computer that runs PHP script. To
export click on File then Export. |
NOTE:
remember where your page will be exported to. if you are running IIS
easyGen will export the file to Inetpub\wwwroot\easyGenEvaluationProject
Otherwise it will export to
a directory called easyGenEvaluationProjectExport which can be found in your
My Documents directory |


